How to Hang & Install Your Art
Choosing an artwork for a specific space or finding space for an artwork can be challenging. Our aim is to give you hints on how to make your art stand out, be aesthetically pleasing, conceptually thought-provoking and inspire the viewer.
1. Respect the art!
Always use our white cotton gloves when handling your photographs to prevent fingerprints and stains. This will avoid leaving marks on white frames or sweat and oily stains on fine art or photosensitive paper.
2. Select the right space
The ideal wall space should let the art breathe and enjoy appropriate lighting. Be considerate of framing styles and create a well-thought dialogue with your furniture. Do not expose your photographs to direct sunlight or too close to spotlights as it may produce glaring reflections and cause fading and deterioration over time. If you opt for a grid or a photographic series, create a dialogue between the artworks and generates meaningfulness, tell a story. For artworks that are part of a series, we would always recommend following the artist’s intention and sequencing of artworks, as it is part of the artist’s oeuvre. Follow our guidelines or Contact us if you have any questions or doubts regarding artist intentions. Otherwise, test your creativity and curating display skills, it will be it will be gratifying.
3. Anatomy of your Wall
Check the wall type before preparing and selecting your installation equipment. What is the wall made of (drywall, plaster, concrete, bricks, wood panelling, etc…) and most importantly will the wall hold a large and heavy piece? Is the fabric of your wall robust enough to allow grid installations or group sequencing? Knocking on the wall usually gives a good indication of its structural shortcomings (use your hand to check for hollow sounds, damp surfaces or structural weaknesses). What kind of hanging hooks and anchors are appropriate for your wall type and hanging fixtures (straphangers, split battens, security fittings or wire)?
Don’t hesitate to ask your framer or us for advice and indications.
4. Test your layout.
It is a good idea to sketch your interior with the photograph(s) to visualise the setting. It is worth noting that framing, colour, medium and size can have a significant impact on the overall perceived coherence and experience of displayed objects.
Once your layout ready, clear the space around the wall, place a folded blanket on the floor and arrange the artworks in the chosen setting to verify if the desired effect is attained. This will give you a good indication of how your artworks will look once installed on the wall.
5. Layout styles
To help you we prepared hanging layout styles for you to get inspiration.
| Single artwork | Above sofa |
 |
 |
| Diptych | Triptych |
 |
 |
| Triptych above sofa | Grid above sofa |
 |
 |
| Group of artworks | Group above sofa |
 |
 |
| Grid | Group sequencing |
 |
 |
| Axis Pattern | Randomized Group |
 |
 |
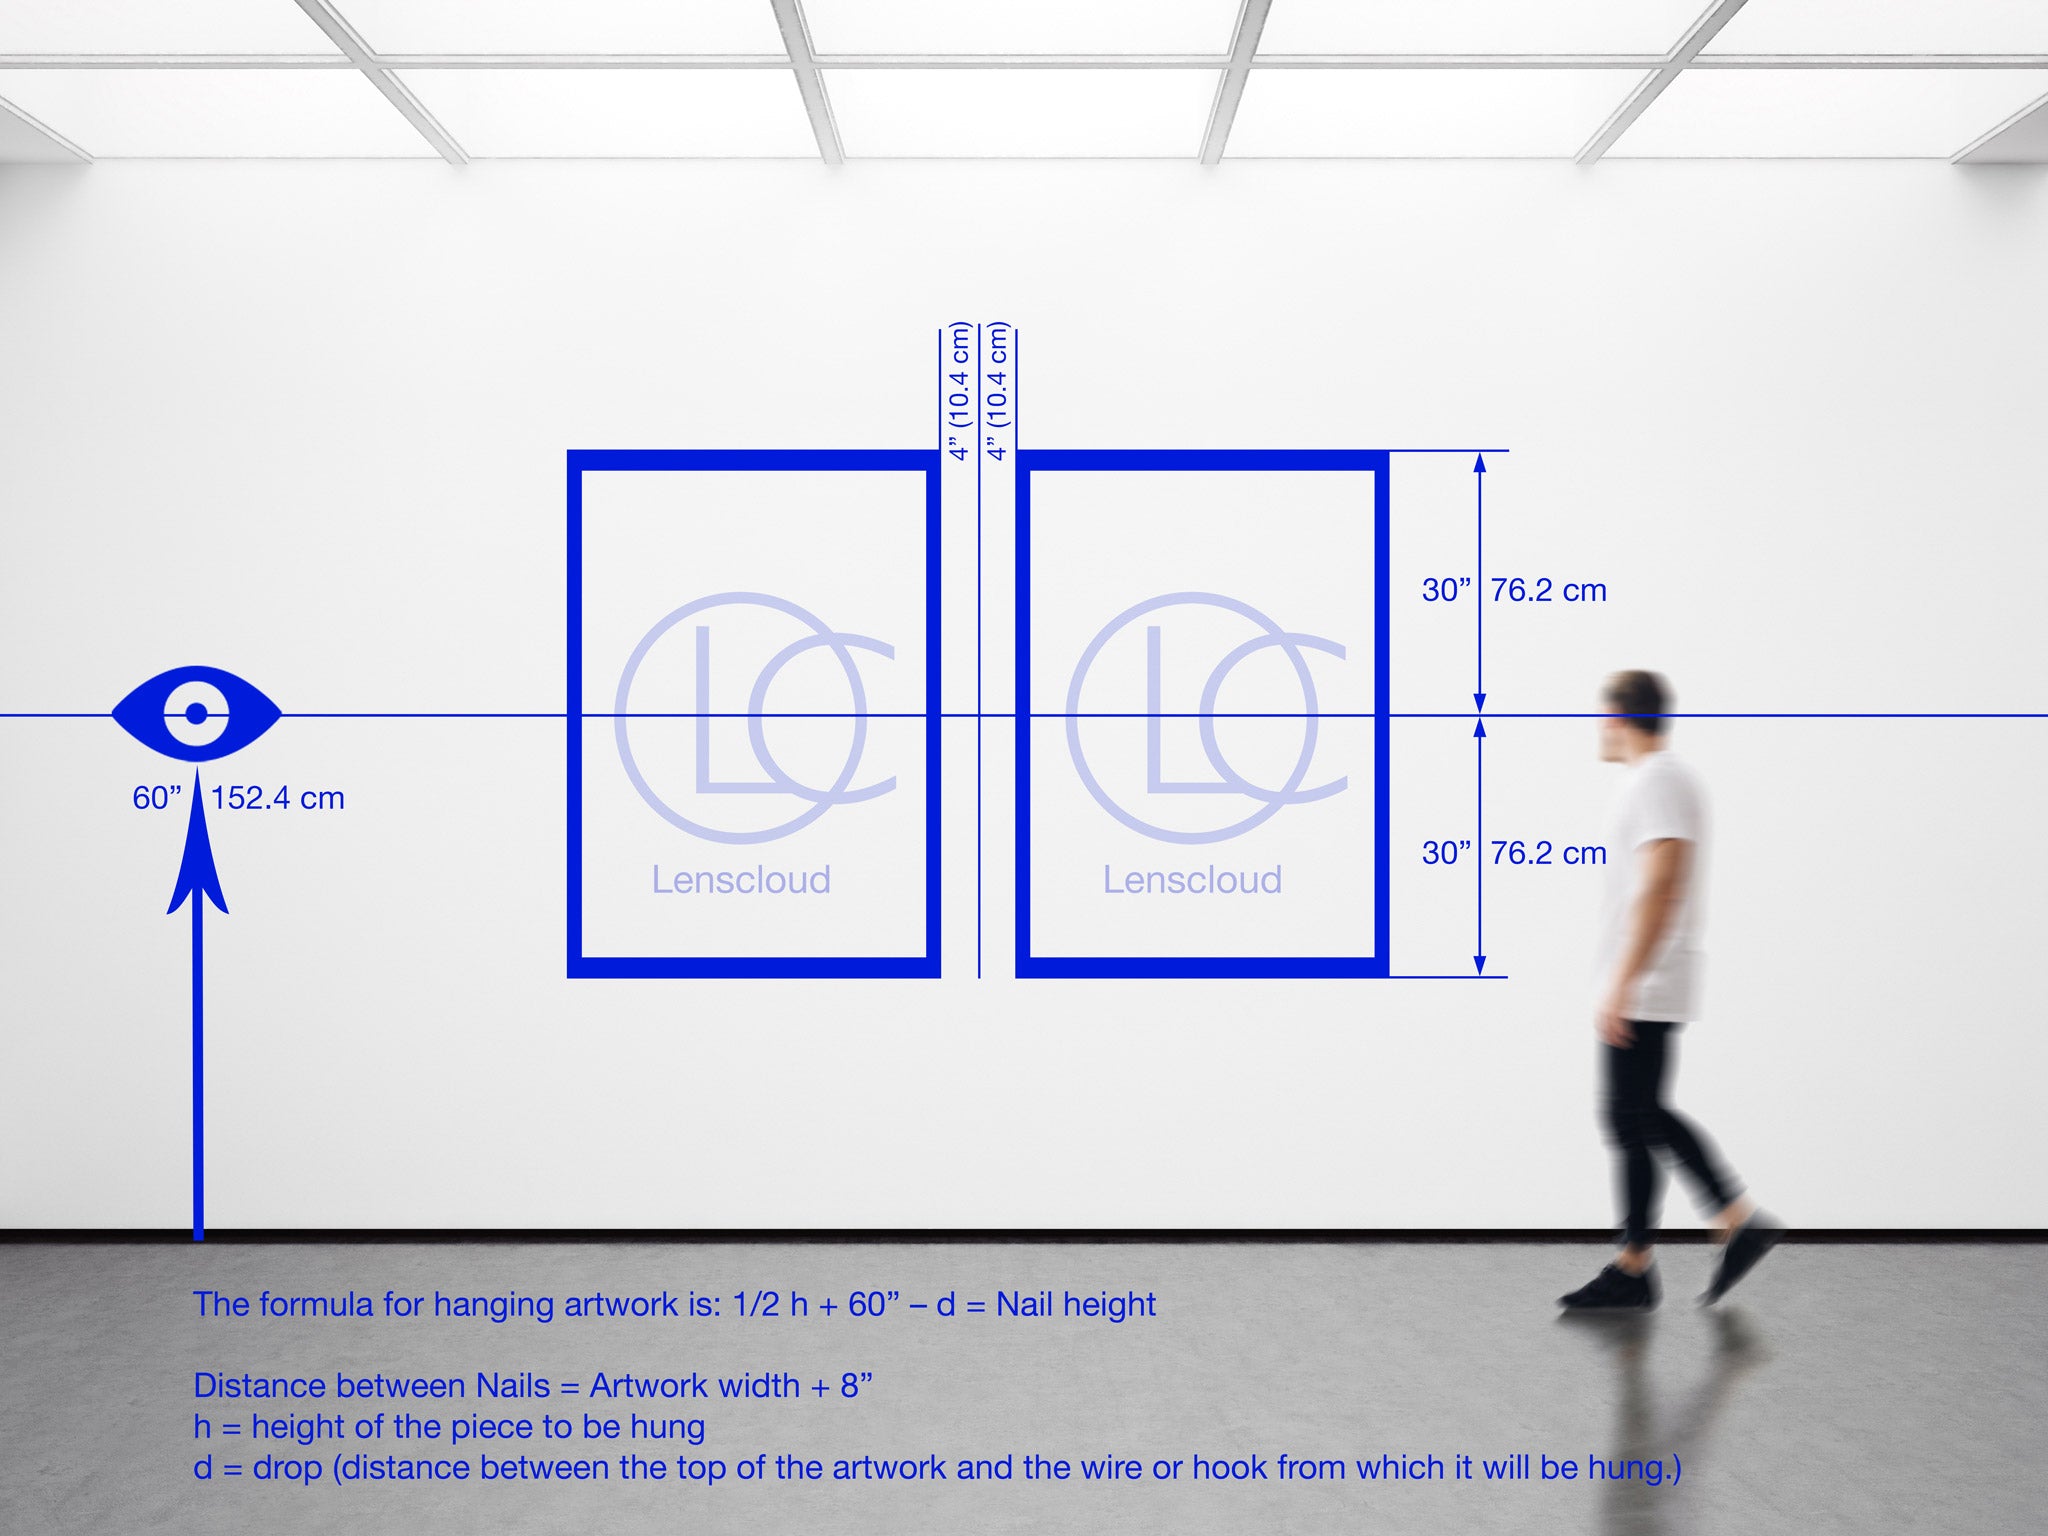
6. Measurements
Height and breathing space between artworks.
Museum standard is 60” (152.4 cm) from the floor to the centre of the image.
The formula for hanging your artwork is: 1/2 h + 60” – d = Nail height
h = height of the piece to be hung
d = drop (distance between the top of the artwork and the wire or hook from which it will be hung.)
The spacing between artworks will depend on the size and number of artworks displayed on wall space, ranging from 2” (5 cm) to 10” (25.4 cm) or more depending on size and available wall space. Allow 8"-10” (20-25 cm) above a sofa or furniture.
Please be aware that these are guidelines only, as every interior has unique attributes and taste may vary.